[ad_1]
On this hands-on Luminar Neo for learners tutorial, I put this easy-to-use and highly effective software program to the take a look at.
Feeling overwhelmed by the huge world of photograph modifying? Suppose you may’t grasp the artwork of reworking your footage into eye-catching visuals?
Luminar Neo may be your golden ticket. It’s beginner-friendly and designed that will help you to create beautiful photographs with ease.
Luminar Neo is an easy photograph modifying software program that’s good for learners who need nice outcomes. It additionally has highly effective modifying options for extra skilled photographers.
On this information, I’ll stroll you thru the necessities of Luminar Neo, so that you’re able to edit a surprising panorama, or a beautiful portrait.
Curious? Get 10% OFF Luminar Neo Professional and discover annual subscriptions with the code BAREFOOT10 here.
Able to embark in your journey to changing into a photograph modifying professional? Learn on, and let’s dive into the world of Luminar Neo collectively.
The best way to Use Luminar Neo for Freshmen
The underside line: I discovered Luminar Neo very easy to make use of and intuitive. Should you’ve ever used one other photograph editor, it behaves just about the identical method. That’s a superb factor.
Let’s leap proper into it. Earlier than modifying my photograph, I wanted to maneuver it to Luminar Neo from my telephone.
One factor I discover actually annoying is shifting photographs from my telephone to my laptop. I exploit Samsung Hyperlink to Home windows a few of the time, which is actually a ache, and by no means appears to work properly.
So I made a decision to attempt the Luminar Share cellular app. I downloaded the app, made positive my laptop and telephone had been on the identical Wi-Fi connection, and used Luminar Share to shortly ship a photograph to Luminar Neo’s catalog. Really easy!
The best way to use Luminar Share to maneuver a photograph to Luminar Neo
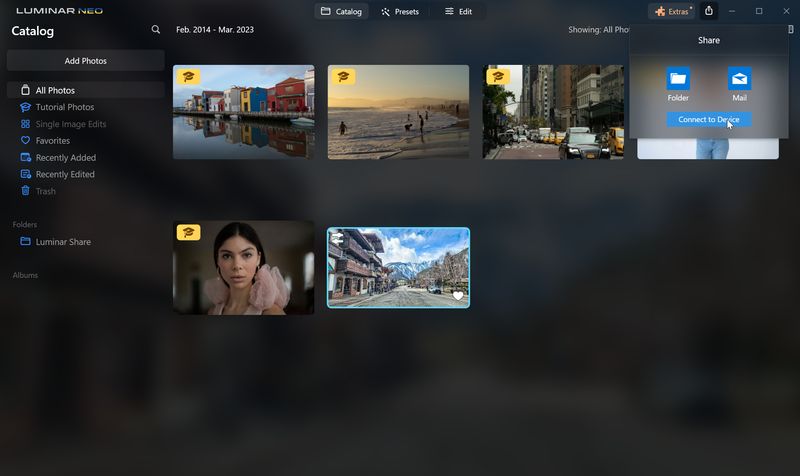
As soon as the app is put in, go to Luminar Neo in your laptop, and click on the share icon in Luminar Neo (prime proper nook).
Click on Hook up with system.
A QR code seems on display, which you scan along with your telephone.
From there, simply choose the picture you wish to share out of your units media library, and click on Ship it to Luminar Neo.
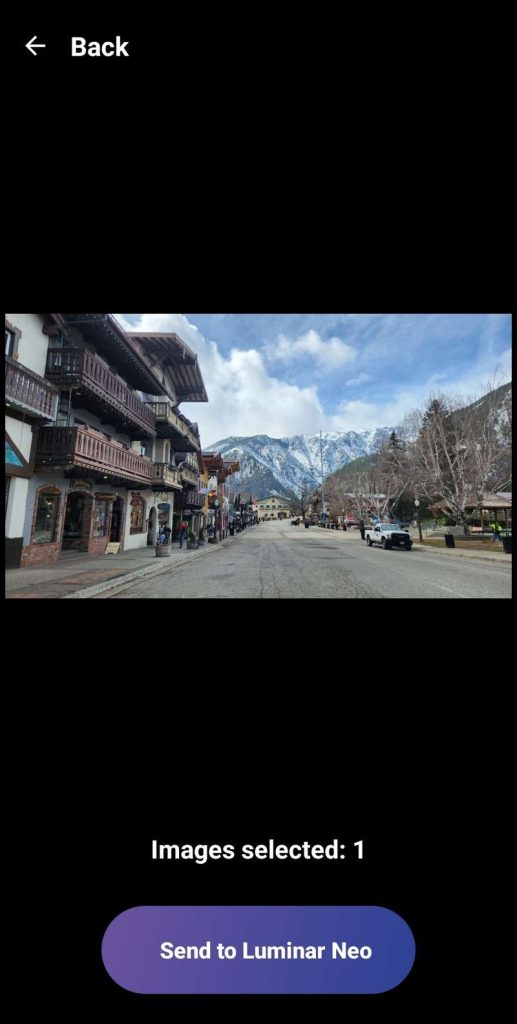
The picture then pops up within the Luminar Neo catalog in your laptop.
Really easy!
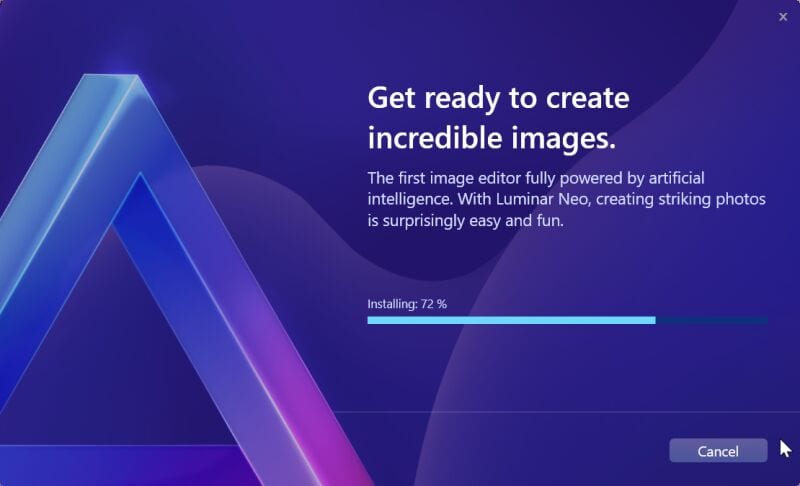
Luminar Neo free trial
Wish to attempt it out? There’s a 7 day free trial.
Click here to download the 7 day free trial.
The best way to edit a panorama photograph in Luminar Neo for learners
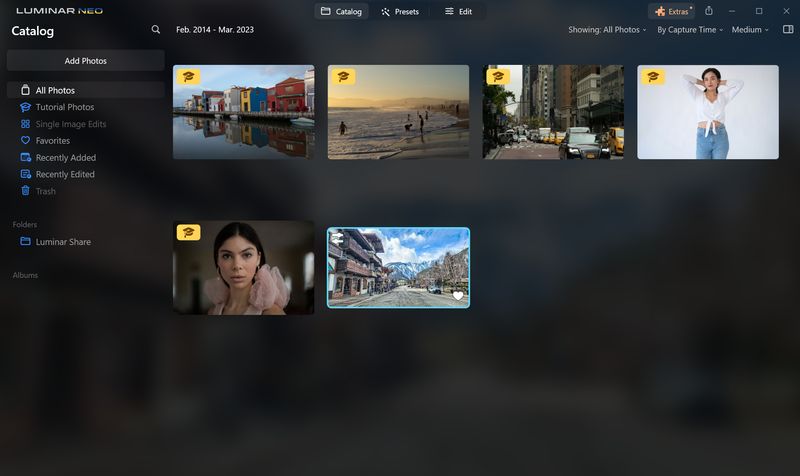
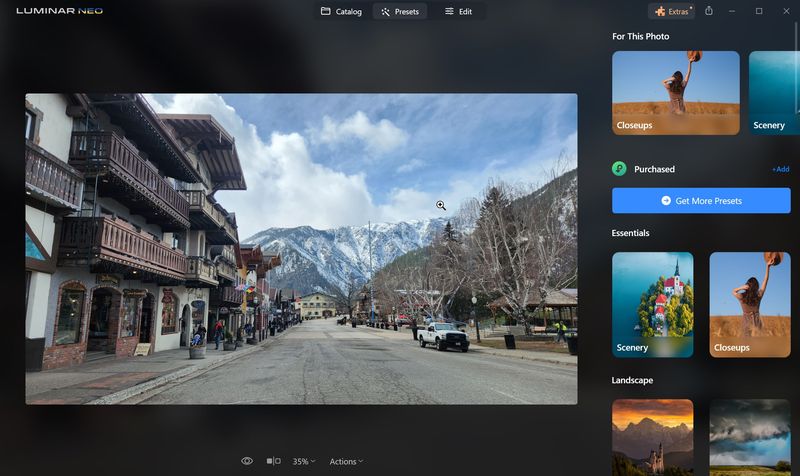
The following step is to open Luminar Neo, and go to the Catalog tab.
On this tutorial, I edit my photograph with out utilizing Luminar Neo’s Extensions to make it straightforward for a newbie. There are some insanely cool ones, together with AI Noiseless (no extra grainy photographs!), AI Background Removing (good for eradicating your bizarre Uncle Bob who’s photobombing you within the background) , and Supersharp (which may make blurry photographs in focus once more). Scroll down for extra on extensions accessible on the finish of the article.
As a result of I already added my photograph from my telephone utilizing the Luminar Share app, the photograph is now within the Catalog.
Simply choose the photograph you wish to edit, and the press Edit on the prime of the display.
I’m modifying a photograph of a road shot in Leavenworth, Washington. It’s a .jpg picture, although Luminar Neo can edit RAW as properly.
Luminar Neo is what’s referred to as a non-destructive photograph editor. That simply implies that it doesn’t destroy, or save over prime of, your authentic photograph.
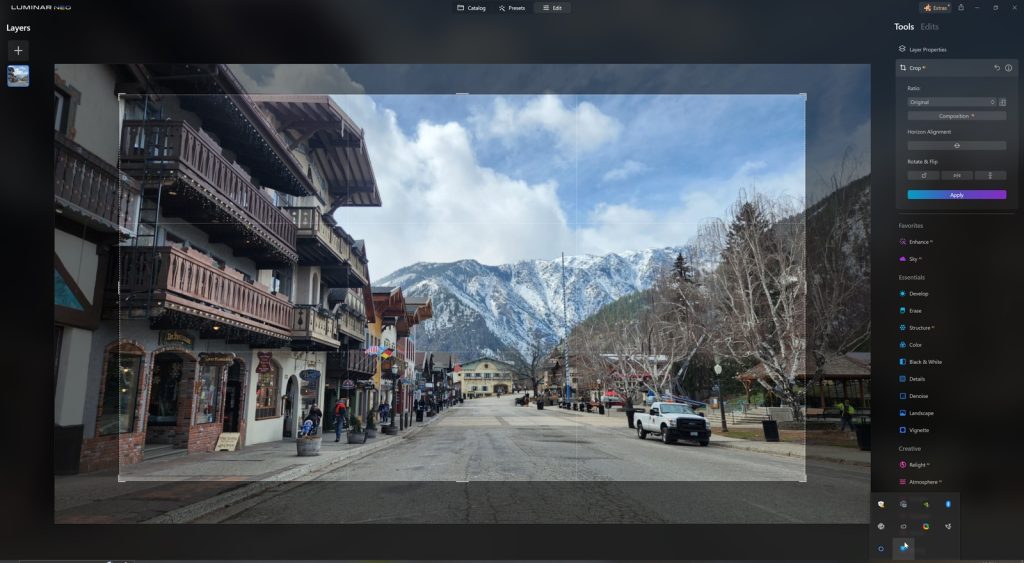
The very first thing I at all times do when modifying a photograph is to crop out what I don’t need. So to do that, I simply go to Instruments, choose Edit – Crop, and drag the sting of the photograph to crop, and click on Apply.
Should you’re in a rush, use the Improve AI device within the Instrument tab, it robotically edits your photograph, together with adjusting the saturation, and extra.
To make use of Improve AI, simply click on Improve, then regulate the sliders on Accent and Sky Enhancer to the depth you want. It does a reasonably good job, and could be all that you want to edit your photograph.
Get 10% OFF Luminar Neo Professional and discover annual subscriptions with the code BAREFOOT10 here.
However, I wish to present you just a few extra newbie options, so I’ll begin with some easy edits.
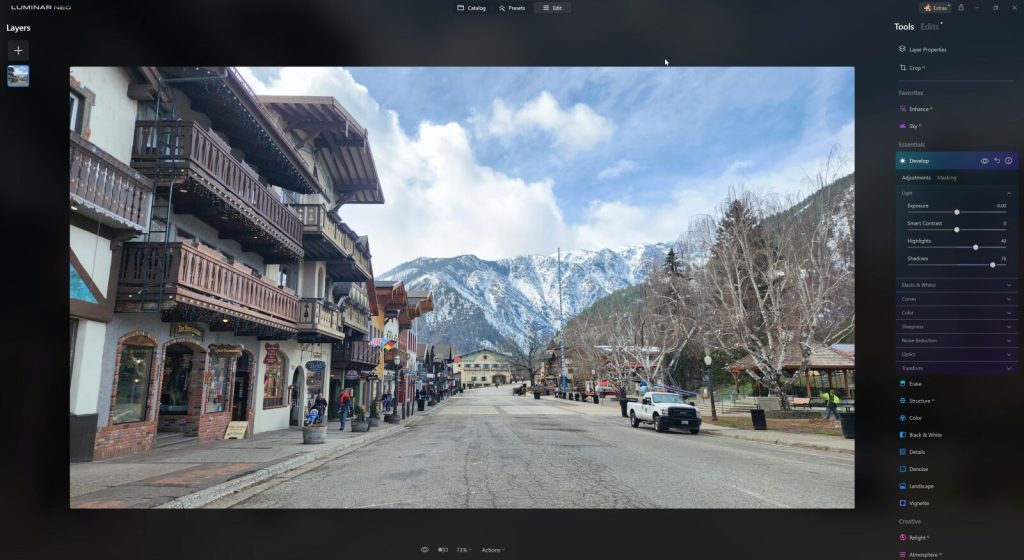
I really feel the picture appears to be like a bit darkish and flat within the buildings, so I’m going to make some primary edits to Highlights and Shadows in Develop.
I click on on Develop, and simply drag the Highlights and Shadows slider to make the buildings a bit lighter, and take away a few of the shadow. Discover this washes out the sky a bit, however don’t fear about that, as there’s a brilliant straightforward approach to repair it.
Really, the entire picture might use a lift of shade, so let’s click on Coloration in Necessities.
From there, I exploit the slider to up the Vibrance.
Tip! Saturation impacts the depth and enhances each shade in a picture. Vibrance is extra particular, and it saturates the elements of a photograph that aren’t that colourful.
Trying on the photograph, it’s not as sharp as I’d like.
I’m going to make use of the Construction AI device right here. It’s a sensible choice, as a result of it enhances picture texture and element. It’s nice for panorama photographs, as a result of it enhances buildings, mountains and rocks, however it received’t actually affect pores and skin tones or different particulars.
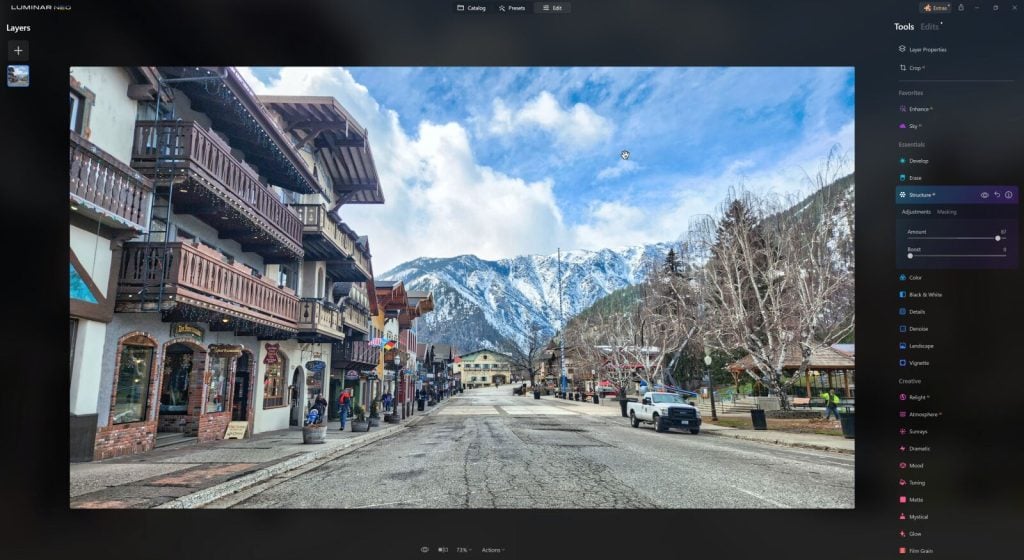
That’s quite a bit higher.
Tip! Construction AI vs the Particulars slider. I like to make use of Construction AI, as a result of it doesn’t globally have an effect on all parts within the photograph, together with pores and skin in portraits, whereas the Particulars adjustment globally sharpens edges, which may make pores and skin look a bit bizarre.
However I’ve to say all of these changes have made the sky look a bit off.
I’m going to mess around a bit with the Sky AI Necessities to see if I could make the sky a bit extra … dramatic.
Click on Sky AI, then click on the Sky Choice drop down.
There’s quite a bit to select from right here.
Only for enjoyable, let’s select an evening sky.
Oh, that’s fairly cool.

Let’s attempt one other – a dramatic sundown.

Additionally cool. However I’m going to stay with my authentic sky.
So I’ll click on the Reset device (within the Sky device) to eliminate my modifications to the sky. You can even go to the Edits tab to take away your edits thus far, however that is faster.
Tip! To delete extra main edits, simply click on on the Edits tab, click on Discard Edits, and begin contemporary. Essential: The software program retains observe of your edits, permitting you to return and regulate them. Nonetheless, reopening a device undoes all subsequent edits, which might be complicated for learners.
To complete, I’m simply going to go to Improve AI, and punch up the Sky Enhancer a bit.
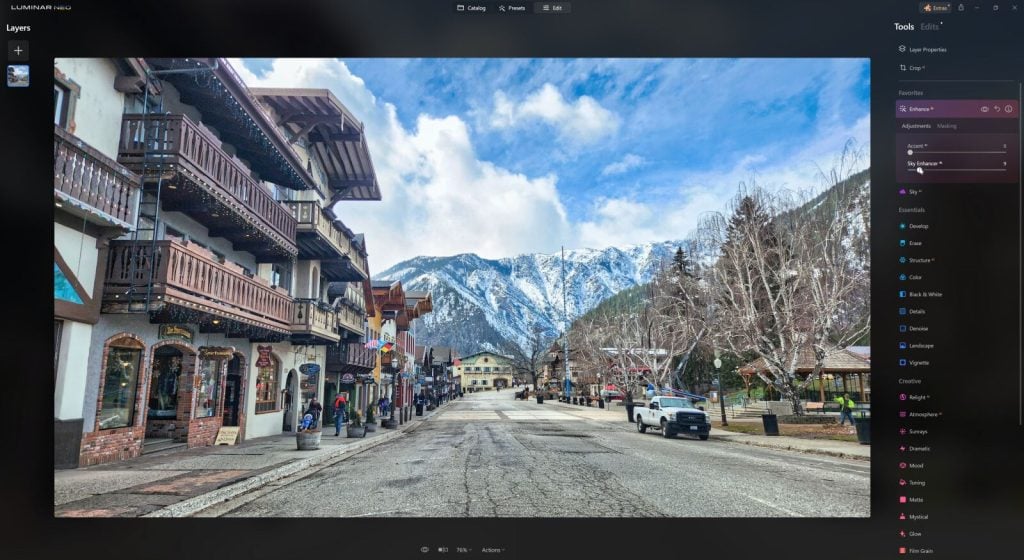
And completed.
It’s that straightforward.
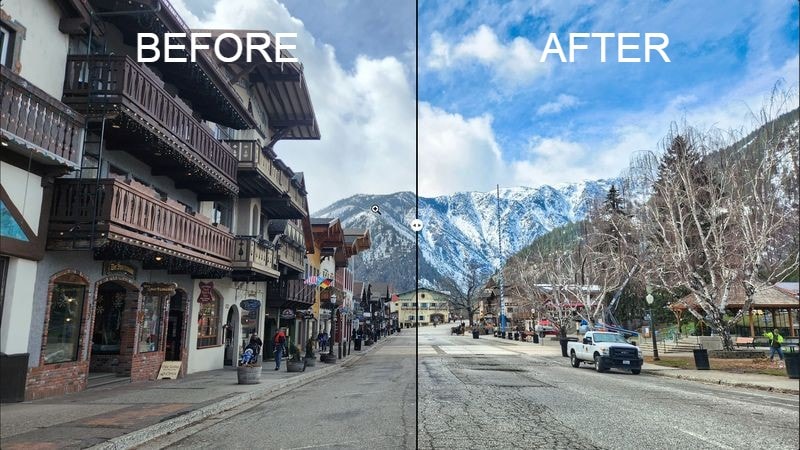
I wish to examine my edits to the unique, so I click on the Examine button on the underside of the display. This exhibits the picture earlier than and after edits. You may seize the slider within the center in Luminar Neo to point out kind of of the edits. Very cool.
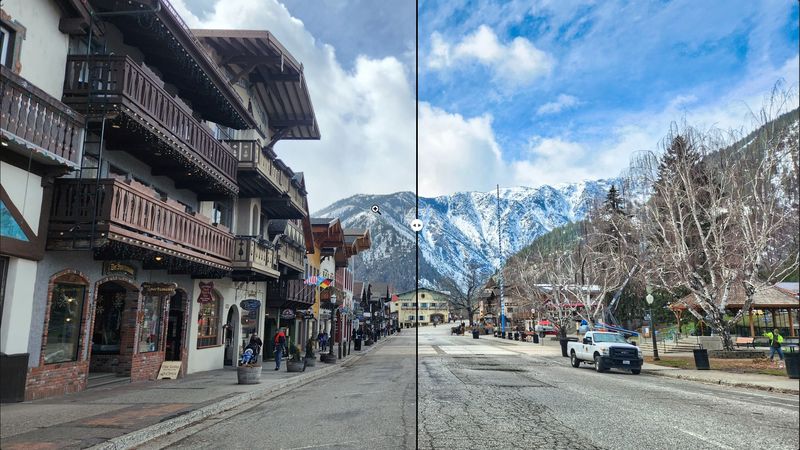
You can even click on the little Eye icon on the underside to toggle between edited and unedited variations of your photograph.
Learn extra nice articles like this:
The best way to save your photograph in Luminar Neo
So, how do I save my photograph?
Simply click on the Share icon on the highest proper, and click on Folder to avoid wasting to your laptop. You can even click on Mail to electronic mail the photograph.
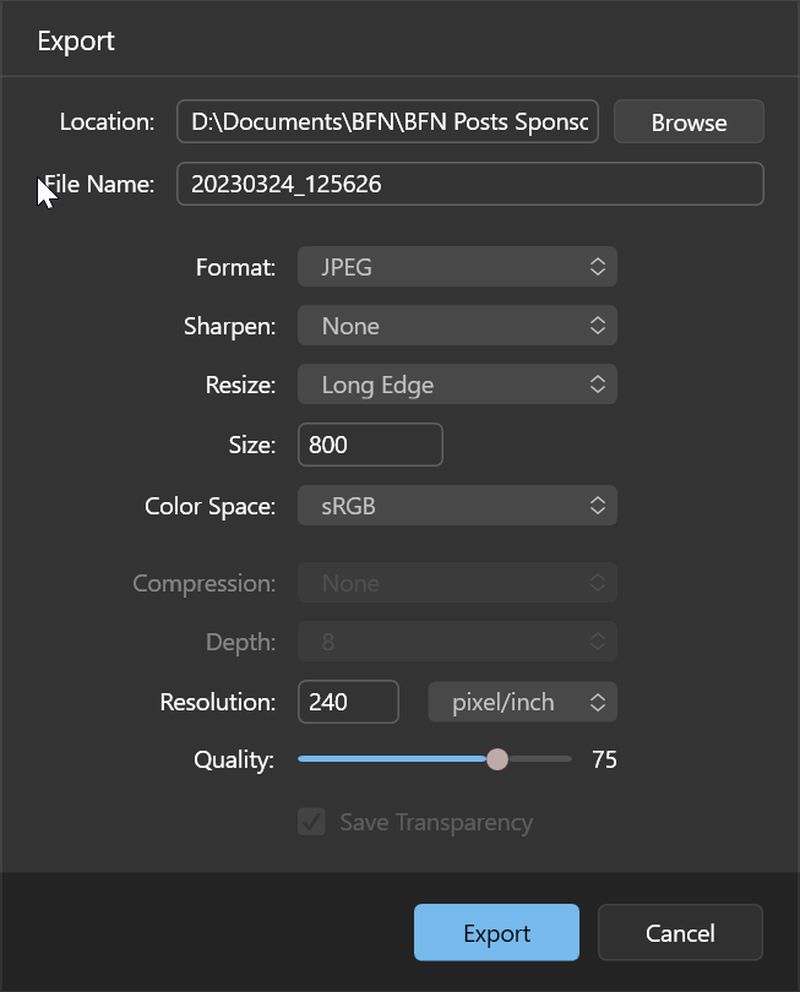
Should you click on Folder, the Export field pops up. You may choose the folder you wish to save to. From there, change the format, regulate the standard, and even change the photograph’s measurement.
What are Luminar Neo Extensions?
Luminar Neo has some very cool extensions accessible. The extensions are included within the Professional and Lifetime plans, however not essentially the most primary Discover plan (extra on that under). Listed here are a few of what I believe are one of the best extensions accessible.
- AI Noiseless (no extra grainy photographs!)
- AI Background Removing (for eradicating ugly backgrounds)
- AI Upscale (for enhancing a print high quality model of a pixilated photograph)
- AI Magic Mild
- HDR Merge
- Supersharp (for movement blur and misfocus)
- Focus Stacking (extra superior, and for stacking as much as 100 photographs to create sharp particulars and enhance depth of subject)
- Relight AI
How a lot does Luminar Neo price?
There are three Luminar Neo Plans: Discover, Professional and Lifetime.
Right here’s what they price, on the time of writing:
- Discover $11.84 USD/month (billed month-to-month) or $142 per 12 months
- Professional $94 USD/first 12 months
- Lifetime $177 USD one-time
The Discover plan provides you entry to the photograph editor, any upgrades and updates within the software program, plus a 5% low cost on Market objects (Skies, Presets, LUTs, Overlays, and many others.)
The Professional plan provides you all you get within the Discover plan, plus entry to current Professional-level extensions, together with AI-based instruments for sharpening, upscaling, noise discount, focus stacking, merging HDR photographs, background removing, gentle manipulation. You can even use Luminar Neo on two units (as an alternative of 1) . You additionally get a ten% low cost on Market objects (Skies, Presets, LUTs, Overlays. and many others.)
The Lifetime plan provides you entry to every thing the Discover plan has, together with entry to all current Professional-level extensions, PLUS entry to future extensions. Extensions embody AI-based instruments for sharpening, upscaling, noise discount, focus stacking, merging HDR photographs, background removing, and light-weight manipulation). You can even use Luminar Neo on two units (as an alternative of just one allowed on the Discover Plan), and also you get a ten% low cost on Market objects (Skies, Presets, LUTs, Overlays, and many others.)
Luminar Neo vs Luminar AI
The reply right here is easy. Luminar AI not exists as a separate program in 2023.
Luminar AI was discontinued in October, 2022, with its current AI options, and extra, rolled into Luminar Neo.
Within the new 2023 Luminar Neo, the AI instruments are rolled into the photograph editor itself, whereas different AI options are within the extensions. There are new AI extensions added on a regular basis!
Luminar Neo low cost code
Searching for a coupon for Luminar Neo?
Get 10% OFF Luminar Neo Pro and explore annual subscriptions with the code BAREFOOT10 here.
[ad_2]
